A few weeks ago, my 3D printer’s extruder broke. Instead of replacing it right away, I started wondering—what else could I do with the machine? It still had precise motion control, a sturdy frame, and working stepper motors. That’s when the idea hit me: what if I turned it into a 2D pen plotter?
This is how I did it, the challenges I faced, and how I finally got it to draw with precision.
Process
Why Convert a 3D Printer into a Pen Plotter?
At its core, a 3D printer is just a CNC machine that moves in three axes (X, Y, and Z). The extruder head moves around, depositing material, but if you swap out the hotend for a pen, you get a machine that can draw instead of print.
Plotters have been around for decades, but most of them are expensive or limited in size. By using a 3D printer, I could create a large-scale drawing machine without buying anything new. Plus, I wanted to explore G-code in a new way and see how well a repurposed printer could handle vector-based designs.
Step 1: Removing the Extruder
Since I wasn’t going to use filament, the first thing I did was remove the hotend and extruder assembly. This included:
•The extruder motor
•The heat sink and nozzle
•The BLTouch auto-bed leveling sensor
After removing everything, I was left with a clean motion system that could still move accurately in all three axes.
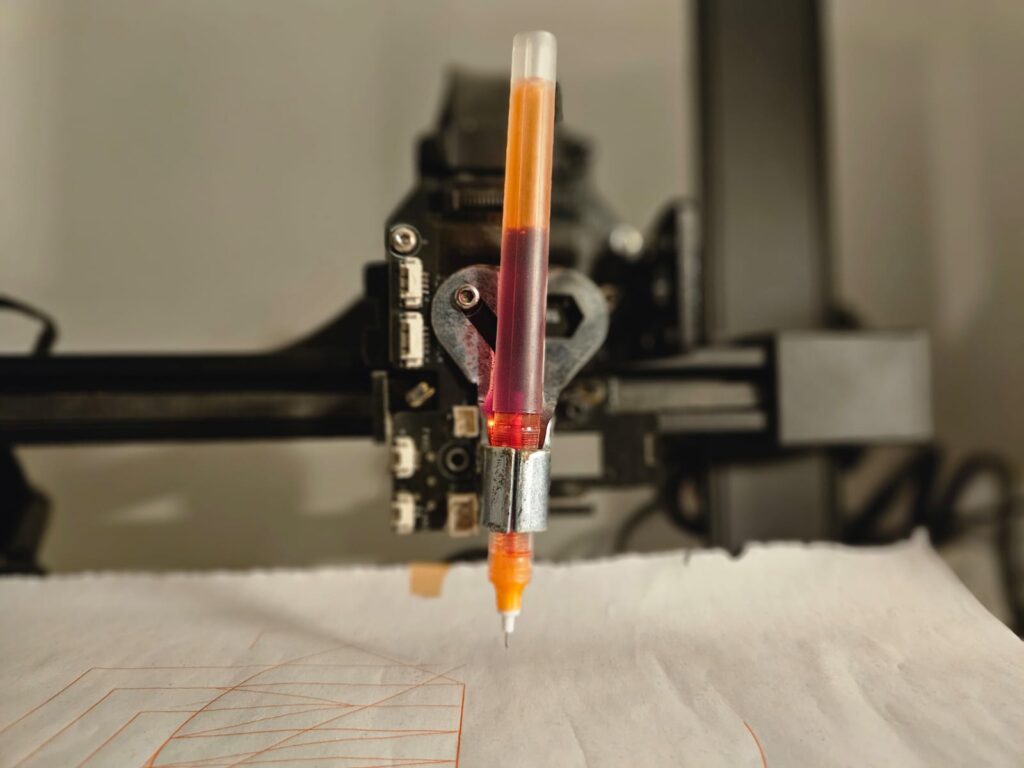
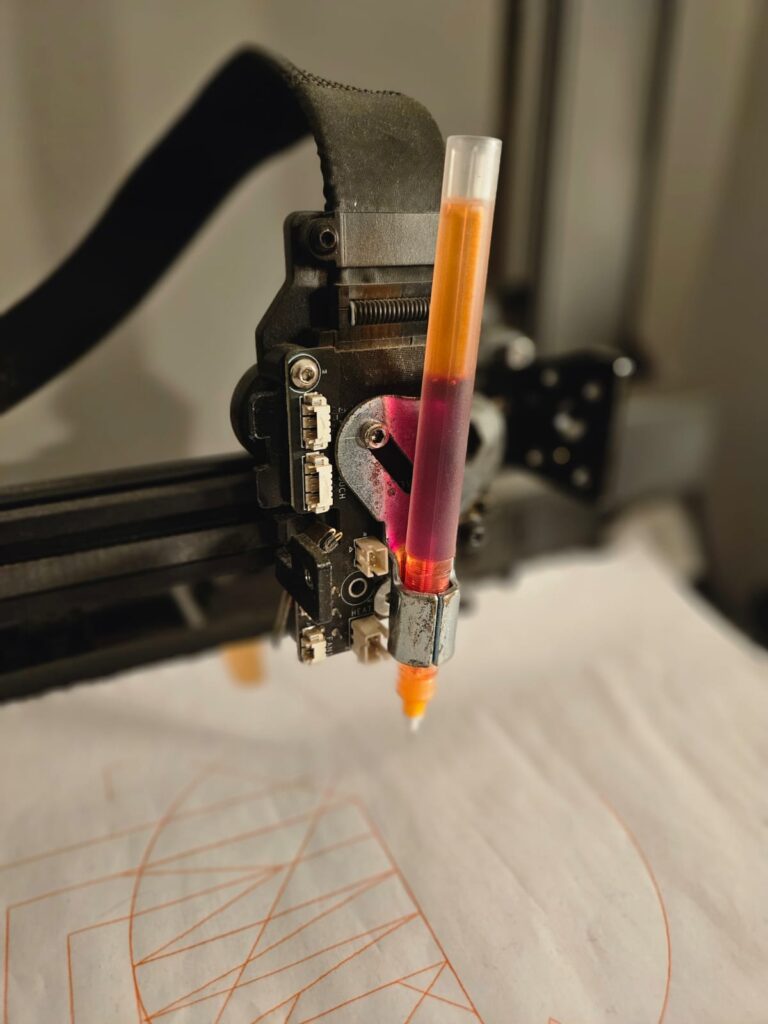
Step 2: Attaching the Pen
The next challenge was mounting a pen where the extruder used to be. I had a few options:
1.3D print a pen holder and attach it to the existing carriage
2. Use zip ties or rubber bands to secure a pen
3.Manually adjust the pen height to make sure it touched the paper properly
I went with a simple pen holder design that kept the pen stable while allowing me to adjust its height. The main goal was to ensure the pen could lift and lower smoothly without too much pressure on the paper.
Step 3: Disabling Heating and Bed Leveling
Since the printer was expecting to work with a heated nozzle and bed, I had to disable those features. Otherwise, it would keep waiting for the extruder to reach temperature. I did this with a few simple G-code commands:
M104 S0 ; Turn off extruder heater
M140 S0 ; Turn off bed heater
M420 S0 ; Disable bed leveling
M211 S0 ; Disable software endstops
This prevented unnecessary errors and allowed the printer to start moving immediately.
Step 4: Manually Homing X, Y, and Z
Normally, 3D printers home their axes automatically, but since I had removed the BLTouch sensor, this was causing problems. Instead, I manually moved the pen to the starting position and set that as the new zero point using:
G92 X0 Y0 Z0 ; Set current position as (0,0,0)This tricked the printer into thinking it had homed properly, allowing me to bypass the usual homing routine.
Step 5: Generating G-code for Drawings
Once everything was set up, I needed a way to convert drawings into G-code. There are several ways to do this:
•Inkscape (with GcodePlot extension)
•Fusion 360 (generating toolpaths for plotting)
•Creality Print (manual coding)
For testing, I started with a simple circle:
G21 ; Set units to mm
G90 ; Use absolute positioning

G1 X100 Y100 F3000 ; Move to start point
G2 X100 Y100 I50 J0 ; Draw a circle with a 50mm radius
This worked perfectly, and I could see the pen tracing a clean, smooth circle onto the paper.
Step 6: Fine-Tuning the System
After several test runs, I realized I needed to make a few adjustments:
•Pen pressure: If the pen pressed too hard, the lines became uneven. Too light, and the ink didn’t transfer properly.
•Feed rate (speed): If the printer moved too fast, the pen skipped. Slowing it down slightly improved accuracy.
•Start position: Centering the design at the middle of the paper made placement easier.
Once I adjusted these settings, the printer-turned-plotter started producing clean, precise drawings.
Final Thoughts
This project gave my 3D printer a second life. What started as a way to repurpose a broken machine turned into a fun experiment in automation, G-code, and creative coding.
Would I go back to 3D printing? Maybe at some point. But for now, I’m having too much fun watching the machine draw intricate designs, patterns, and even my own name.
If you have an old 3D printer collecting dust, I’d highly recommend trying this out. It’s a great way to experiment with CNC-style drawing, and it opens up a whole new range of creative possibilities.
Let me know if you’d like any refinements.